Monday, July 25, 2011
Starting the Control Panel

Thought I would start my control panel tonight.
It's been painted with some semi-gloss black spray paint, probably about three coats.
I went over the black with another three coats of Krylon Triple Thick acrylic clear coat. It's hard to get that to go on even, I had better luck in the past.
The good thing however is the CPO covers a bulk of the control panel.
The switchable 4/8 way joystick has been installed also. I'll clear coat the bolts tonight and tighten everything up.
Looking good (to me) !
Thursday, July 21, 2011
Some Pics & Progress
With the cabinet on the way I found myself over on the KLOV site looking for parts.
I've got a source for T-molding off Ebay, but can't order yet as I don't know the width of this cabinet. Sideart is on order (well, will be shortly) I'm just waiting on my printer to return from vacation.
Over on KLOV I was able to purchase my plastics, a really nice looking bezel, marquee, and populated control panel. I've got the control panel stripped and started painting it tonight. By tomorrow I'll give it a few more coats of paint then clear coat it with some Krylon triple thick.
I used my wire wheel brush to remove the rust from the existing bolts, I'll also clear coat them. All my plastics have been polished with Nuvos and I'm very happy with the shape of all of them. Some obvious wear spots, but that is to be expected on parts that are 30 years old.
I've also cleaned up and polished my buttons. The buttons had some wear around the outside, but I was able to sand off the extra plastic. A lil Nuvos also helped bring these back to life with a nice shine.
I should have the control panel done this week, that way I can set it aside.
I'll move onto the PC shortly.
The idea is to do what I can so that when I get the cabinet I can simply do the body work, paint, then get everything into it quickly.
Donkey Kong Project
In anticipation of getting this cabinet in August I've started to source out parts and do whatever prep I can. I've decided that like my Donkey Kong Jr project I will add "admin" buttons to the underside of the control panel.
To give this cabinet a wider range of playable games I am going to use "Player 1 start" and "Player 2 start" as buttons A & B. The "jump" button will actually be "Player 1 start."
The underside of the cabinet will have a buttons for Enter, Escape, Credit, and Player 2 start. The Enter and Escape buttons are used in MAME, as is the credit button.
The PC is going to feature MAME with a custom MaLa layout. I'm also going to include prior generation console games. In fact any console that requires less than two buttons will be added to the PC.
I'm really excited to have this machine playing NES and Sega games.
Donkey Kong Jr. meet your father .................

Last summer (give or take) I completed a restoration/revamp of my first ever Nintendo cabinet. I've posted a few pictures on the blog about it, as well as the cost break down. After I completed that project I fell in love with Nintendo cabinets.
In all honesty I'd love more in my collection. And I can say that luckily I've added another machine to the fleet.
I pick it up at the end of next month from the local coin-op auction.
It's bought and paid for and I've already ordered parts.
I'm doing what I can now so that I can complete the project quickly.
Monday, May 30, 2011
Donkey Kong Jr MAME Cabinet
I didn't chronicle this build on my blog.
However for anyone interested I did outline the build over on KLOV.
Here is the link : http://forums.arcade-museum.com/showthread.php?t=146729
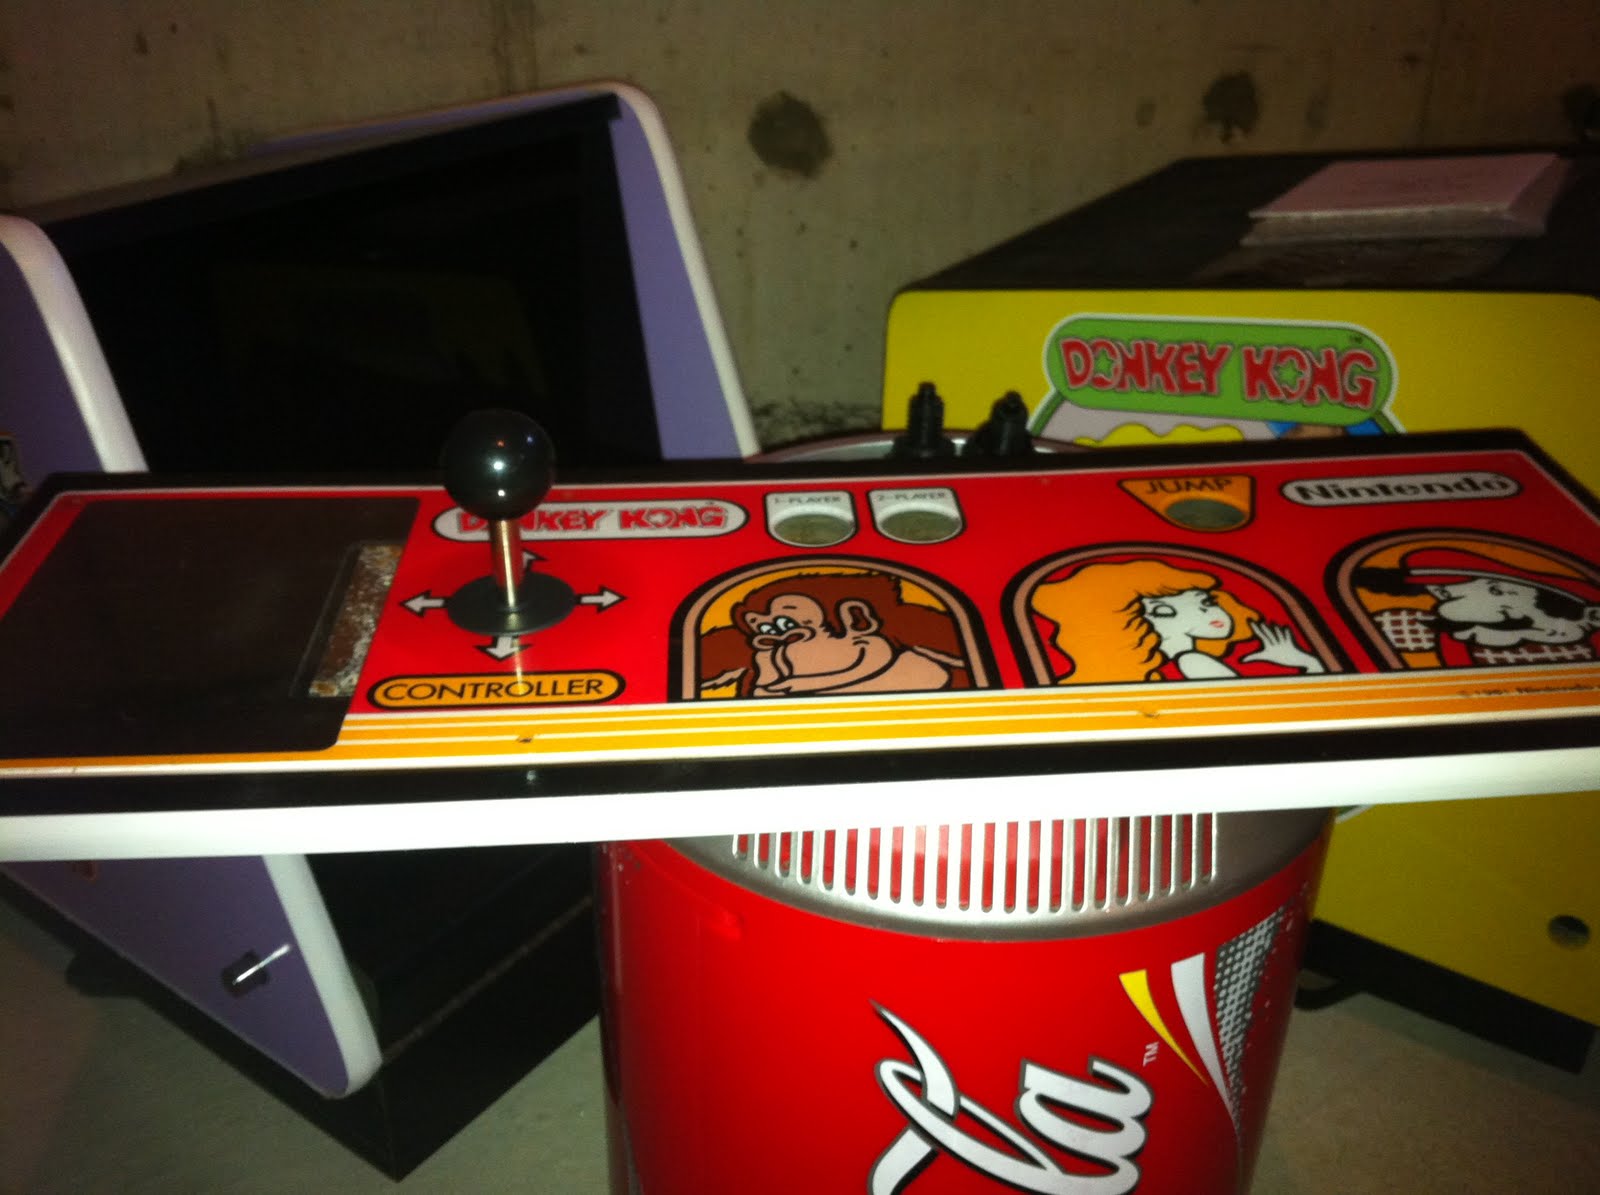
Picked this up in August of 2010. I really started falling in love with Nintendo cabinets as of late, the colors, the art, the size, the classics, everything about them. I was super stoked when I had the opportunity to get this gem. It's the pride and joy of my collection.
I spent $494 getting this project to where it is now, however I sold the original monitor for $150. Which really makes my total $344. It's running MAMEv 124 with a complete ROM set. However I used ROMlister to compile a specific list of games that utilize no more than one button. I used MaLa as the front end, and all the menu screens are custom.
I really love this project, I'd LOVE another Nintendo cabinet.
Here is the spending breakdown :
Donkey Kong Jr Cabinet $75
including Bezel, monitor, DK 3 CP &
upper marquee bracket
Donkey Kong Jr CPO + $35
lower marquee bracket (shipped)
Bondo $12
Delivery $0
Control Panel (0.5" MDF) cut $10
Bondo Kit/Sand Paper/Wire Brush $29
Paint Roller + Extra Rollers/Glue
Light (18" Home Depot) $13
Plastic Polish $15
Spray Paint x 4 $12
Art Work (local print shop) $5
Orange Paint $20
Wood base, rubber feet, $10
screws & bolts
Side Art (on order) $50
20" Samsung LCD Monitor + $122
New PC Speakers
P4 Computer $46
T-molding $15
Marquee $25
Total: $494
Subscribe to:
Posts (Atom)